Sunday, 31 August 2014

Scott's Front Garden 12-18/8


That's Scott's front garden with his boat - "Thistledue" and Arctic Smoke parked up!

Work pushed sailing into second place this year but I did have a week and decided to visit my friend Scott and his wife Margaret who moved to their new house on the River Deben a couple of years ago. I had to work on the Monday. The boys signed up for Tuesday to Thursday when we were due to over-night at Scott's and where Sharon was going to join us and return home with the boys on the Friday.

We formed a flotilla on the Tuesday when we met up with Howard (on Latitudes) and Tony on (The Hustler) and headed down river with a fresh westerly behind us at around 1300. The intention had been to make for the Colne but Howard was feeling a bit under the weather so we stopped off at Queenborough for the night.

First stop ashore was the House and Home for drinks:


Next day breakfast on board before heading up the coast to the Colne.


We had good weather and a good breeze and an enjoyable day...


We made the Pyfleet for about 1930, left Arctic Smoke and The Hustler on a buoy and took Latitudes in to Brightlingsea hoping to be able to get ashore for a meal. The tide was low but Latitudes was just able to sneak in thanks to her lifting keel. The bad news was that the water taxi stopped running at 2100. Plan B was therefore a takeaway consumed on Latitudes before we headed back to the Pyfleet to raft up with the other boats.
 
The next day was Thursday so Artic Smoke had to move to make our date with Scott. An early 0400 departure was required to work the tides and get up to Scott's for HW which is required to get into his garden dock.
 
 
As it turned out a change in the wind and tide had the boats grinding into each other at 0330 so I decided to leave then. Vince got up to help me man the boat and we motored down the Colne. We were soon sailing and had a great sail to Woodbridge Haven at the entrance to the Deben where we arrived at LW at 0930.
 
I had viewed the new video of the ever changing entrance and it said there was 6 foot of water at the lowest at low tide and so decided to press on - passed and anchored yacht waiting for water - and get up the river. When 0 meters showed under the keel on the echo sounder we retreated! I thought perhaps we had drifted out of the deep water and so tried again but with the same result.
 
 
Common sense finally kicked in and I rang the Assistant  Harbour Master who advised waiting for 2 hours after HW. We dropped anchor and had a rest until 1130 and then carried on.


We got to the Tide Mill at 1330 and rang Scott. He told us where to pick him up so that he could pilot us the last mile or so to his front garden. We moored up there at 1430.


The rain that had threatened on our approach arrived shortly after Sharon did and so the Barbequed dinner was consumed in doors after a tour around Scott's impressive estate. After a delightful evening Sharon and enjoyed a proper bed and the boys slept on the boat. I got up 4 to ensure the boat took to the ground OK - which she did without my help.
 
After breakfast we all went up to Sutton Hoo and were impressed by museum and grounds.
 
Then we all returned for lunch before high water. I was keen to move off before the high tide so that if we went aground we would still have an opportunity to get off. Fortunately we were on very high springs so tides so there was more water and time to play with than normal. Sure enough however the first attempt to get AS out was foiled when her rudder grounded on the edge of the cut. After much heaving on we were able to reposition her in the middle of the cut and were able to reverse out on the second attempt. The nail biting was not over yet however because there was still a risk of the fast flowing tide setting the slow moving boat down on the bridge which was only a few meters away. We survived however and AS with Scott on board to pilot us the first mile made off down river.
 
 
In the midst of all the excitement I forgot to get off the boat to say good bye to Sharon properly. She later told me that I appeared very anxious during the whole operation!
 
I dropped Scott off after a mile or so and continued down river. After a while I passed "Try Again" the boat that first got me thinking about the possibility of getting a bigger boat - a process which culminated in the purchase of Arctic Smoke.


We continued down the river and set sail and made for Hamford Water where we arrived around dusk and anchored for the night.
 
I had decided on a lazy day for Saturday and so slept in. The next morning the breeze freshened and I went off in search of a quieter anchorage in The Walton Channel only to find the lee shore too close for comfort and so I returned to Hamford Water.
 
The next day Sunday, the wind was even stronger from the SW - force 6-7 was predicted by the inshore waters forecast and a gale in the full shipping forecast for Thames. However, I had to get back for my Mum's 80th Birthday celebrations and so left on the last of the morning's ebb.
 
 
An exciting close hauled sail down the coast followed. After a couple of hours we were down to 2 reefs but AS sailed well and easily punched through the steep chop kicked up by the wind over tide. It took me a while to figure out how to get the Aires to work properly in these winds and it was only once I had reduced the boat's weather hem by reducing sail that it was able to steer effectively. I realised later that adjusting the relative position of the chain connecting the steering lines to the tiller would have had a similar if less sensible effect. The fact that Arctic Smoke was sailing comfortably at 6 knots to windward in a force 6-7 indicated that the sail plan was probably just right.
 
At South West Barrow I decided to make for the Swale rather than the Medway. The latter would have required a beat. I picked up a buoy at 1755.
 
The next day - Monday I motored up the Swale and Medway and returned to Chatham.


Murray, Margate Hook and mother and child; 26-27 July


That's Murray at the helm.

Having stopped off at Margate Hook on the way west last year I decided it would make a pleasant overnight anchorage for our weekend. We had good weather if light winds and arrived at low water with the Hook exposed and giving us a smooth anchorage and so it remained through dinner. However, once the tide rose and covered the sands we were rolling too much for a good night's sleep.

The following morning we left with a decent breeze and had a good sail for a couple of hours. Then the breeze died away so we decided to motor up the Swale rather than outside Sheppey.

The Elmey buoy was occupied:


I'd seen a seal on the buoy a few years ago and couldn't help wondering whether mum was her!

A few hours later we were moored up in Chatham having had a pleasant weekend.

Monday, 21 July 2014

Kids and Dogs Day


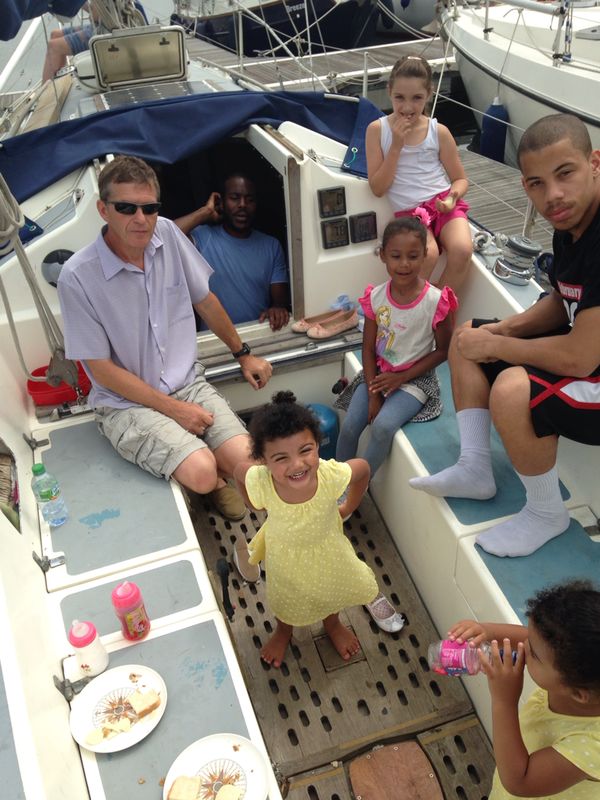
That's Angel, twin Grandaughter No 2 and last Sunday was a day out on the boat with her, her sister, their Dad, their two sisters (it's complicated), my Daughter, Ursula, and her partner Caleb and the two dogs Kayah and Sunny.


Bottom right clockwise: Angel, Tianna, Me, Charles, Alana, Savy, Vincent.


Me, Ursula and Vincent out for a short sail down the river. We got back into the lock just as a torrential thunder and lightening down-poor, hit. We were soaked within seconds.


Charles and Caleb


Kayah


Sunny, who shortly afterwards decided to go for a swim in the Marina and I had to yank him out by his collar.


Tuesday, 15 July 2014

New Livery, Whoops


After a few trials and errors, Ian finalised the Spray Hood and I fitted it at the weekend and even though I say so myself AS now looks pretty dam smart.

I spent Saturday afternoon up Chris's mast again fitting his new stays that he made up himself and saved a small fortune on rigging fees. I was pinched and squashed in a few places I would have preferred not to have been but no serious damage done!

Sunday was a sailing day and a chance to impress some new crew with my boating skills. James and Will turned up around 0930 and after I briefed them on the procedure for getting through the lock safely, we radioed the lock house got permission to lock out, cast of the lines and gently departed the pontoon. As it turned out it was a good job it was gently because I had completely forgotten to remove the shore power line and we therefore on the brink of causing some serious damage. However, our sedate departure meant that I was able to take the way way off quickly enough with a burst of reverse and was then able to jump back on to the pontoon to unplug the shore line and hop back aboard before the crew were able to fathom quite what a fool I had been (well afterwards they both said they would like to come again anyway).

We then went for gentle sail with the light wind but against the flood tide down the river to Half Acre Creek. After some debate I reckoned we had enough water to take the short cut down South Yantlet Creek and anyway the tide was rising! A few burst of rain along the way but a pleasant sail and the sun came out for lunch at anchor in Half Acre Creek. The return was a mixture of flat calm and brisk head winds against the tide. With full springs against us we had to motor when the wind was dead ahead but on occasions we were creaming along at 6 k close hauled.

We all enjoyed the day immensely and both James and Will want to come back for more!

Unfortunately I forgot to take any more photos.

Next Sunday a day out with the kids and dogs!

Tuesday, 8 July 2014

Compass and Mildred

Last weekend, new compass installed and Mildred's tubes cut back to enable folding. Also variety of other smaller jobs and up Chris' mast to measure for new shrouds. Ian came over too to finalise spray hood fitting. Not quite final as it turned out but it is now done and awaits fitting. Various bits broke or went overboard in the process so ordered new fittings all round. Had to borrow some of Chris' to enable fitting process.

Monday, 30 June 2014

The Great Escape ....

....from the Marina.

Finally got sailing. Joined by Mick and Alan. Frantic morning of jobs on Saturday 28/6. Out on the 1230 lock. Discovered tiller not straight but off to port by about 20°. Embarrassing but not a show stopper. Will probably leave as is for now. Motored as far as Stangate into light headwind. Then just enough to sail. After a slow start a good sail round Sheppy to Faversham Creek. Aries a great success and admired by all. Christened "Mildred" in honour of now retired George. Got hit by a few showers but otherwise pleasant.

Picked up buoy in Swale around 2000. Dinner on board. Dropped buoy around 1000 on Sunday and motored up Swale. Ran aground twice and foul of shipping regulations. Discovered anchor not bent on! Crew contemplated Court Martial but left me off with a piece of cake.

Wind picked up to 20+ k by Queenborough and storming close hauled sail up the river. Locked in at 1530.

A successful first outing of the year. Still lots of jobs to do including shortening Mildred's mounting tubes which are currently preventing the lift up mechanism from working. Also air leeks in water system after reinstalling water tank and installing new GPS/AIS transponder.A major tidy up and clean up also required.


Looking West up The Swale
Mildred in action

Monday, 23 June 2014

Tiller installed but still not ready for sailing


That's the good news. And it is a beautiful piece of sculpture - thanks Paul. Also on the positive side Mick finished wiring up the new instruments and rationalised the engine wiring. However, the water tank has not yet been reinstalled and the Genoa not yet bent on. I did manage to get up the mast to check out the cause of the frayed genoa halyard. Possibly a routing issue but will have to get back up there once the Genoa bent on to be sure.

Oh and I almost forgot - Ian brought the new sail cover over which just fits and looks very smart and the spray hood which did not and will have to be adjusted. Sorry Ian!

Still loads of less major jobs to do (including adjustments to the Aries which may require use of a hacksaw) but the plan for next weekend is to get the genoa on and the water tank installed and then catch the lunch time ebb for and a short sail to the Swale. We'll see!


Monday, 16 June 2014

Update in pictures and few words!

Also attached rigging to new chainplates after more drilling cos pins different sizes!

Monday, 2 June 2014

Finally....


Lift in was booked for 1330. I spent the first part of the morning tidying up and stowing tools. Unfortunately I still need the ever growing collection of them which now includes Chris's new Dremel that Alan and I bought for him for his birthday. I did manage to transfer some stuff to the Car but the boat is still more like a floating workshop than a sailing boat.

I then washed down the deck and topsides. With everything ready I then relaxed for the first time over the weekend. After an hour or so I suddenly remembered that I ought to check that everything was ready to start the engine. That was the point when the day took a downhill trend.

The previous weekend I took all the things off the hooks by the companion way steps (keys, small torches etc) and put them on the chart table to avoid knocking them off into the bilges whilst laying the new instrument cables. One of those things was the key for the battery isolator switch. Off course the bloody thing had vanished. I turned the reasonably tidy boat upside down looking for it to no avail. Howard had volunteered to come over and so I rang him on the off-chance he might have a spare. He did as it happens but I rang too late - he was just pulling up at the marina! However, he did have jump leads in the car and was confident that he could rig up a hot wire start.

Once lifted in and we'd had a cup of tea with Tony who had also turned up we tried the engine. Nothing completely dead. Howard eventually found that the end of the wire from the starter switch was not connected and try as he did over the next hour or so he could not work out where the dam thing was supposed to be connected. He then checked the solenoid which worked but did not operate the starter motor and therefore bypassing the switch did not appear to be an option either. He had already stayed out too long and so eventually we had to accept defeat and I had to accept the need for some serious electrical analysis to work out what was going on. Howard returned to work and I arranged for the boat to be towed to her berth the next day.

I starting tidying up and Tony got ready to leave too when the phone rang. It was Howard. "Check the back of the starter motor solenoid he said, there  must be a connector there that I missed and if so that's where the wire should go." Fortunately I had a small mirror for just this purpose and there indeed was the connector hiding away right at the back and impossible to see without a mirror. Once connected the starter motor sprang into life and after a short while the engine started and was running smoothly. [I had previously tried to start it by hand but just did not have the muscle. I must get some easy start.]

I fitted the emergency tiller and off we chugged. I was a bit concerned about being able to manoeuvre with the emergency tiller because it provided very little leverage but it was fine. After a few trial manoeuvres we were moored up in Arctic Smoke's berth.


I tided up a bit, re-fitted the isolator switch (but could only fit one of the two bolts properly because there was just not enough room behind the panel to hold a nut between my fingers and get it into position. Looks like significant dismantling will be required. Howard had early given me very poor marks for the state of the electrical connections so those will need seeing to too!

Next weekend with Chris's help again, we'll try and finish off the tiller fitting which still requires a lot of work. Hopefully the new tiller will arrive shortly after!

Maybe one day I'll be able to go sailing!

Sunday, 1 June 2014

Ready for launch

The last few weekends have been full on trying to ensure we're ready for the launch date which at time of writing is tomorrow!
After many delays I was finally able to pick up the castings for the rudder shoe and tiller fitting on Friday.

I knew there would still be a lot of work to do but it was a real marathon and without Chris leading the work for most of Saturday and Sunday it would never have happened. Also many thanks to Johnny, Alan and Howard who both helped out. It took 5 hours to drill the 20 x15 mm hole for the rudder shaft and we had to finish off at Howard's workshop because my drill press ran out of puff. So to did the 20 mm drill bit i had bought but a minor miracle the tool shop in Rochester had one which I purchased just before it closed on Saturday afternoon.

In between attacking the rudder shoe Chris started work on the tiller fitting. The hole for the shaft was out of alignment and needed reeming out on two sides. I had spent 5 hours on Friday afternoon with a file and made some progress. Chris brought his electric saw over and with a hacksaw attachment we managed to butcher it sufficiently to sit square on the shaft. I spent a few hours today making bronze shims to fit inside to take up the gaps. Still not finished though.

Last weekend i painted a new go faster stripe and fitted the new echo sounder transducer and the log impeller. An absolute nightmare getting the cables from one end of the boat to the other but finally did it.

Tomorrow will clean the coachroof side decks before launch at 1330. Oh and hope the engine works!

Monday, 12 May 2014

More work on the Tiller fitting...

First stop at the weekend was at Mike the foundry man.

He explained the modifications I needed to make to the existing plugs and the requirement for a core box. He also provide me with a couple of sketches which was just as well because despite his patient explanations I only half understood. I didn't want to disturb his Saturday morning any further and hoped that it would sink in with further study of the diagrams.

Here are the modifications to the plus which I managed to complete by about 2pm


The extra bits shaped in and stuck on with marine filler are to required in order to get the things out of the sand without damaging the sand mold left behind.

Next up was making the "core box". This is what's needed to form a sand core of the same (hopefully) dimensions of the shaft and which is then inserted into the molds created by the plugs. This was what took me the longest to get my head around and I still can't say I completely understand it far less explain it properly. 

Quite how to go about making this thing was the next challenge. Luckily Chris dropped by as I was deep in head scratching mode and suggested casting it from the previous inside-out version (see previous post). That however required extending it which I achieved by extending both ends with stiff cards and then pouring in resin:


The resulting shape required a lot of tidying up before it could then be place in a container (an empty marine filler tube provided by Chris into which I then poured more resin (having previously waxed all the surfaces:


That got so hot (the resin hardens as a result of a chemical reaction with the hardener and that produces heat) at one point that it started to smoke and I was worried the whole boat might go up in flames.

That was the last job on Saturday at about 7 pm before going out for a curry with Alan.

After a lousy night's sleep (there was gale blowing all weekend which added to the affects of the curry and my increasingly frustrated state of mind I think took their toll) the first job was to cut the mold off.

This I managed but the resin did not pour properly and left cracks and this was the result after removing the mold and cutting out the plug:


However, by lunchtime after a great deal of work I had repaired the two halves and added the internal tapers required by Mike:


The bit in the middle is the extended plug from which I made the cast.

I spent the rest of the day filling the holes where the anode bolts had been (see a previous post for why); removed the flexible water tank for repairs/replacement and the old log impeller which I'm going to replace.

On the way home I dropped off the plugs and core box at Mike's. Unfortunately he was not in so I was not able to establish whether my work would do or not. As of the time of writing this I have not heard from him and so am hoping no news is indeed good news. Of course whether the resulting casting will fit the rudder post is yet another matter.

To be continued....

Friday, 9 May 2014

Expletives galore and got a date

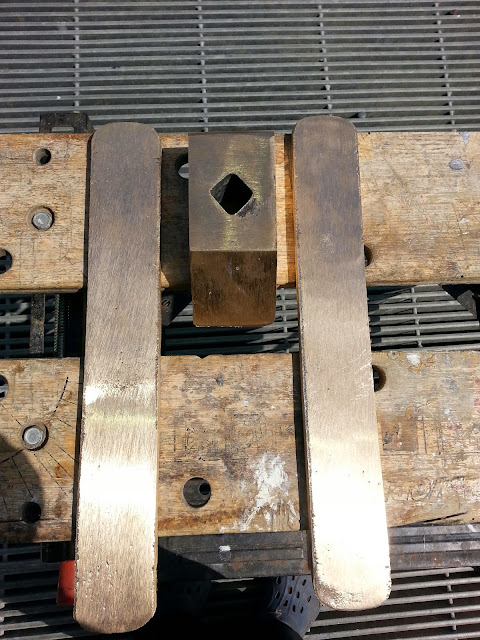
Last weekend with a lot of help from Chris and under his guidance I finally managed to construct this plug from which I hope Mike the foundry man will be able to cast a bronze fitting for connecting the rudder shaft to the new tiller (shortly to be made by Paul of 'Oflandandsea' on eBay:


The two halves will be used to create impressions in sand into which the molten bronze will be poured. Somehow they will be able to produce one solid bronze version of the above but only after I have done some more more work.

It took me almost the entire weekend to produce the above - hence the reference to expletives of which there were plenty - and (wrongly as it turned out) a solid inner plug for the hole. As Mike pointed out he needs a hollow version of that not a solid one. I haven't yet got my head around how he will use the eventual three pieces to cast the final object and have to visit him again for tuition on further modifications to be made to the above too before he can use it. I hope that doesn't take up another precious weekend.

I've now booked a slot with the marina to lift AS back in on 2nd June. With a couple of days off work, less (as it were) a Saturday that I'm required at home to celebrate my Grand daughters (twins) birthday, that means I have about 8 days to:

  • Install the new rudder shoe (that Mike will make soon I hope)
  • Re-fit the prop plus related anodes
  • Fill the old anode holes in the hull (removing this completely because it looks like it may have contributed to the corruption and poor performance of the Verometal anti-fouling.
  • Fit new transducers for Log and Echo-sounder (which will require removing the flexible water tank somehow)
  • Final tightening of the new chain plates
  • Re-antifoul with the replacement Verometal
  • Clean and wax/polish the hull
  • Service the sea cocks
  • Replace Galley hull skin fitting but note below
The other jobs I'm probably going to pass on are:

  • Stern gland stuffing box - I'll give it another go if I have the time but I haven't been able to shift the bloody thing, but I have pumped grease all the way through until it comes out the stern tube without coming out of the gland stuffing box, so I'm concluding that will keep the water ingress down to acceptable levels
  • Lightening conductor only needs the water tank out rather than the boat on dry land
  • Not going to fit a clever fridge so only need to replace galley skin fitting with like for like (that will then mean all skin fittings have been replaced).

Also, while it's not an out-of the-water job, the fact that I've clearly not got any sailing in yet (and will have very little sailing time this summer anyway due to work and domestic commitments) it looks like I will postpone the fitting of the 2 x 100 W solar panels that have been sitting at home for 15 months already) until next year!

An extra in-water job to add to the previous list is to ensure that the electrical circuits are not aggravating the electrolysis reactions which seem to have buggered up the previous Verometal anti fouling. I hope to draft Mick in for that and a number of other electrical jobs.


Tuesday, 29 April 2014

Bow made good, footless and wheeless

Having installed the new chain plate on the bow the next job was to make good the ugly mess I had created when removing the old one. I tackled that a couple of weeks ago on the 18th April.

First I had to remove the plastic bag covering the hole which previously I had filled with expanding foam. That stuff is very useful but horrid to work with it sticks to everything and is impossible to get off one's skin once it has set which it does very quickly. It had continued to expand after taping on the plastic bag so there was a lot of excess to remove. Fortunately it is very easy to cut one dry and so that was achieved quickly.

Next I had to insert a a plastic gasket over the top of the foam because the resin that I would use to make good the bow would dissolve the foam. I used a section of a Jeckell's sail bag and stuck it in place with marine sealant. Then a few layers of fibre glass resin and matting until it looked like this:


I got the mixture slightly wrong and so the resin dried to quickly but I just got away with it. Then resin mixed with particles until it formed a think paste and applied that which ended up looking like this:


Once that had dried liberal helping of marine sealant before fitting the metal work. Tightening up the four machine screws holding the rear plate on in the picture below was the worst part of the job. Luckily Alan was around and he therefore held the tops of the screws whilst I hung upside down in the anchor locker and tightened the nuts on the inside. My back was very sore for a number of days afterwards.


The next day - once again with Alan's help I fitted the stern chain plate permanently and was then able to refit the backstay, forestay and furling gear. That took a few hours. Fitting roller furling gear is a fiddly job - at least I find it so. Despite re-reading the instructions a number of times I couldn't work out how to keep the foil in place in order to insert the various screws. I resorted to a bit of tape that just about did the job. Once I had finished I discovered the grub screw for that purpose! Anyway I got it all back together as you can see from the photo below and despite the boat still being stuck  firmly on dry land, it started to feel a bit more like a boat again. I haven't transferred the shrouds to the new chain plates yet - that can wait until the boat is back in the water.


I took the week off after Easter and was back at the boat on the Tuesday and Wednesday.

First job with Chris's help was to remove the outer prop bearing casing. This we managed but instead of the expected cutless bearing Chris discovered it was a white metal bearing. This apparently is poured in place in liquid for (having previously ensured plenty of grease to prevent the white metal boding with the shaft. However Chris also diagnosed significant wear on the prop shaft and concluded there would be no point in replacing the bearing without also replacing the prop shaft! Happily because the stern gland did not leak significantly and he also concluded that it would be OK to refit the external bearing but be prepared to have to replace the whole shaft at some point in the future. No doubt the engine will have to come out too at some point so I'll probably do both together.

I had also previously noticed that one of the bolts holding the rudder shoe in place looked rusty and so needed to check that out. I consulted Chris once again and he recommended that I took the shoe right off to check it out thoroughly. The last thing I wanted was the rudder failing mid Atlantic!


I put a spanner on the nut expecting to have a real fight to move it but the nut just fell off. It had actually corroded right through.


 That's it on the cradle in the photo below.


The bolt was also severely corroded at the tip.


 The other nut and bolt was at least still intact but it too was severely corroded.


Wit both bolts removed I was able to remove the shoe.


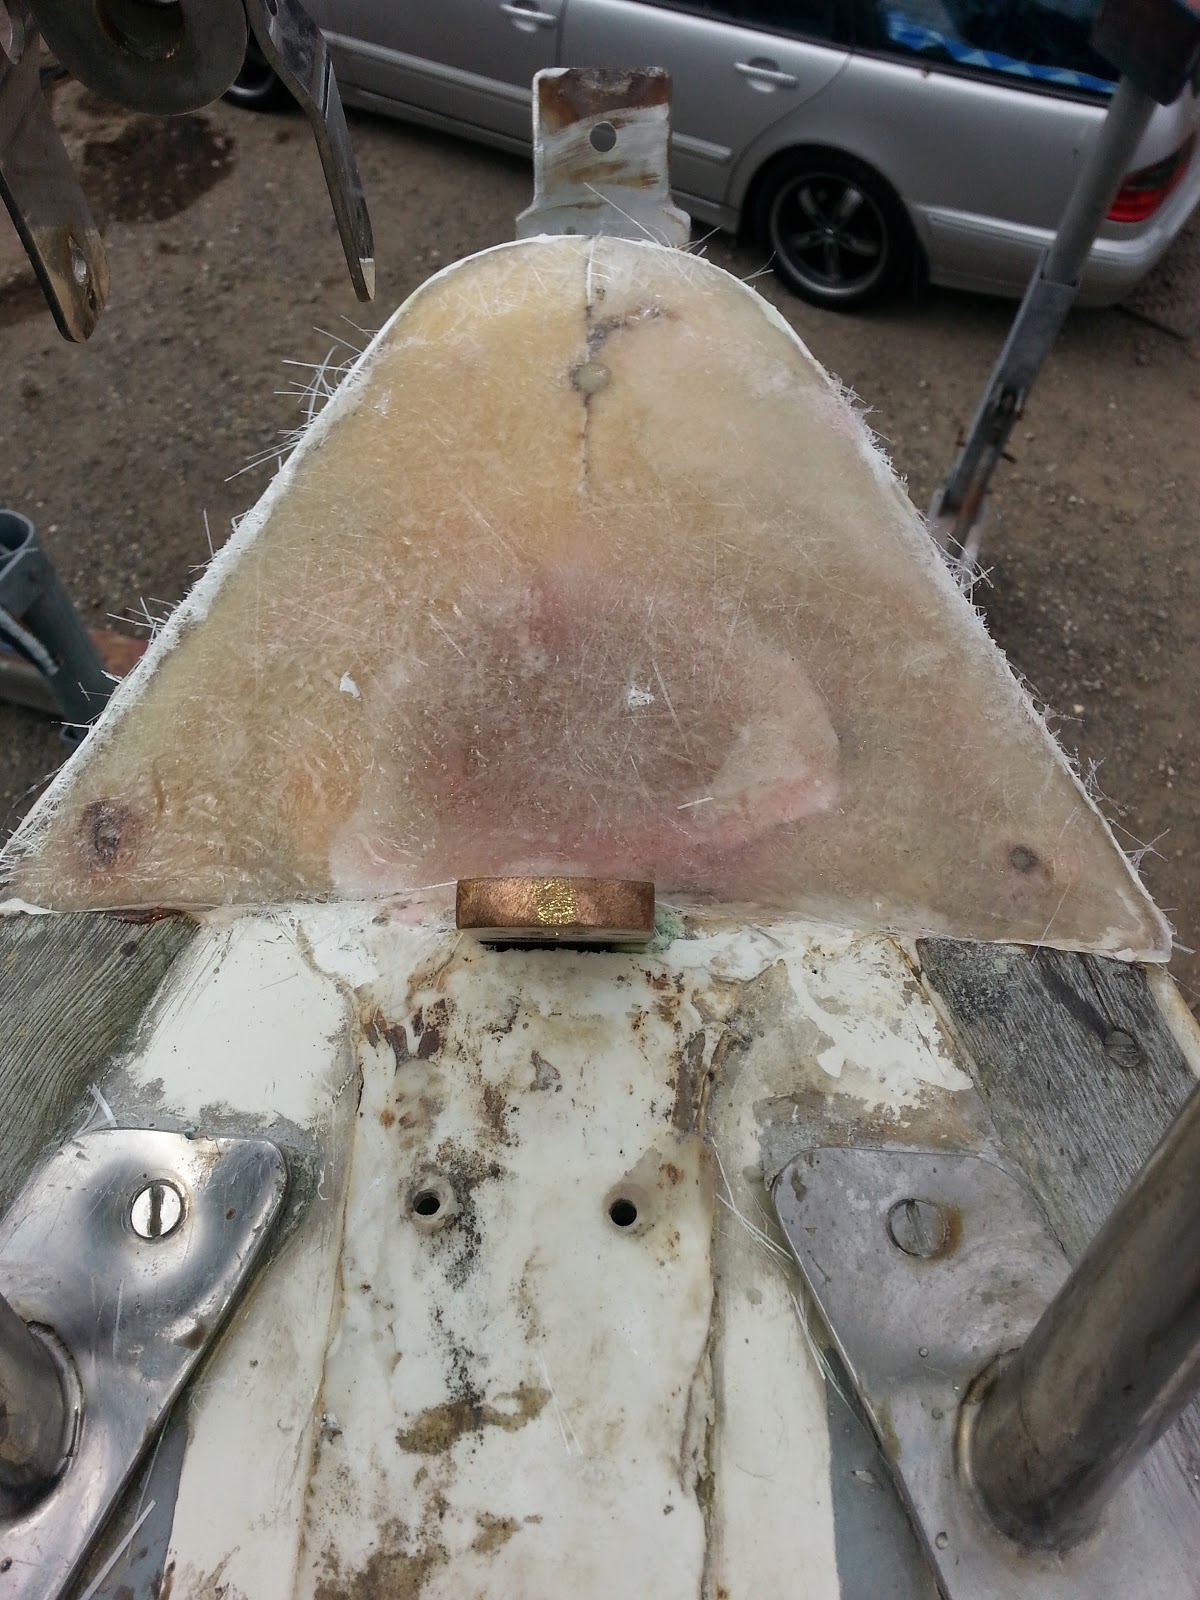
Unfortunately I didn't take a photo of it. On initial inspection it didn't appear to be in bad shape but Chris spotted crevice corrosion and indeed once cleaned up it was very evident. Chris recommended getting a new one cast in bronze and he immediately set about making a plug to go with the shoe to the foundry. A quick search on the internet (by Alan of all people) and a local address was located in Rochester only a few minutes away from Howard's house. I rang them up and spoke to Mike and arranged to take the shoe and plug round the next day. His foundry is actually in Charlton however.

I spent the rest of the day cleaning up the shoe and bonding plywood strips to the outside in order to ensure a thicker casting was produced. They weren't completely flat so I decided to use marine sealant/bonding gunge for the purpose and hoped that it would set over night so that I could clean it up and ensure all the surfaces were smooth. It did thankfully and in the morning I completed preparing the shoe and took it and the plug that Chris had made over to Mike, the Foundry man in Rochester. I said he could do the job and so I left it with him to price up.

On the way back I stopped off at Howard's for a coffee and natter and once back at the boat decided I would tackle the stuffing boxes on the rudder and propshaft. Both were pretty inaccessible but I had previously managed to move the nuts on the rudder one and so decided to look at the prop-shaft one first. Some weeks ago I had discovered a small inspection hole cut out of the quarter berth bulkhead that I thought must have been made for the purpose of accessing the stern-gland stuffing box. Previous owners had also ensured that the special spanners required were stowed nearby (it took me months to figure what they were). Anyway I could just get the spanners on the nuts at full stretch but the inspection hole was so small that there was precious little room to apply any leverage and I could not move them an inch. It didn't help not knowing which way I should turn the wretched things. I suspected from previous tussles with engine stuff that the only other option was likely to be to approach the gland from inside the cockpit locker on the other (port) side of the boat but that I would probably have to remove the starter battery first and then the platform that it was fixed to and that that task in itself would be a contortionists nightmare even if it could be achieved without radical surgery. I therefore took the easy option and squirted loads of penetrating oil over the nuts and hoped that I would have more luck on my next visit. I then turned my attention to the rudder stuffing box.

That entailed hanging head down in the rope locker (after almost getting stuck in it) and wielding the spanners from there. I got the stuffing box apart OK and removed the old stuffing rope. Fortunately there was spare stuffing rope on board and I cut a piece to size inserted it and applied loads of grease and did the whole assembly back up. Job done within an hour! Then I turned my attention to the steering gear. The steering had become very stiff towards the end of the season and I had no real idea about how sound the steering cable was. Only a fairly small length could be inspected visually and I thought that to be safe I really should remove it. Easier said than done in the confined space under the cockpit sole, approached as I said head first by hanging over the top of the cockpit locker. However, better to tackle it now whilst safely on dry land rather than have it fail mid ocean or even on the river!

I could just reach the nuts on one end of the cable and started to undo it and then realised that the cable ends eventually disappeared up into the steering column through two small diameter holes that the end fittings would never get through and that I would therefore have to remove them first. Not only that but the prospect of refitting them through the system of pulleys and the steering quadrant in the very confined space below the cockpit sole was not one to look forward too. I almost bottled out at that point and very nearly left it all as was. However, I forced myself to face the music and carried on. It soon became clear that the only way of getting the cable off was to cut it which I did with the help of my bolt cutters.

I then decided that re-fitting new cable would be a chore I could do without and that this provided the ideal opportunity to dispense with the wheel entirely and replace it with tiller steering, which, although Arctic Smoke had never had, was the original design configuration. I therefore removed the bolts holding the pedestal in place and went from this:


To this:


Granted it looks a right mess with the locker contents strewn everywhere but the cockpit immediately felt much more comfortable without the wheel and it was certainly much easier to move around. Of course the tiller will have to be installed and that will take up space, but I will install a hinge on the end so that it can be stowed in the upright position.

Since the above works I have heard back from Mike the Foundry man that he can cast a new rudder shoe for £45 which is a bargain and I also tracked down Paul of 'OflandandSea' on ebay who can make me a new tiller for around £250 which considering the time involved is also a bargain.

Next job a return match with the propshaft stuffing box and refitting the external bearing on the propshaft and the prop itself. Then perhaps fitting the new transducers for the depth sounder and the speed log. That will require removing the flexible water tank which will be a chore, but it has a leak and needs a good clean so it needs to be done anyway. With luck I'll get that done this coming weekend and then it's 'just' the anode(s) to sort out before re anti-fouling with the replacement Verometal copper mix and then I can get her back in the water. Still loads to do afterwards of course but the prospect of getting some sailing in begins to feel less far fetched than it once did.