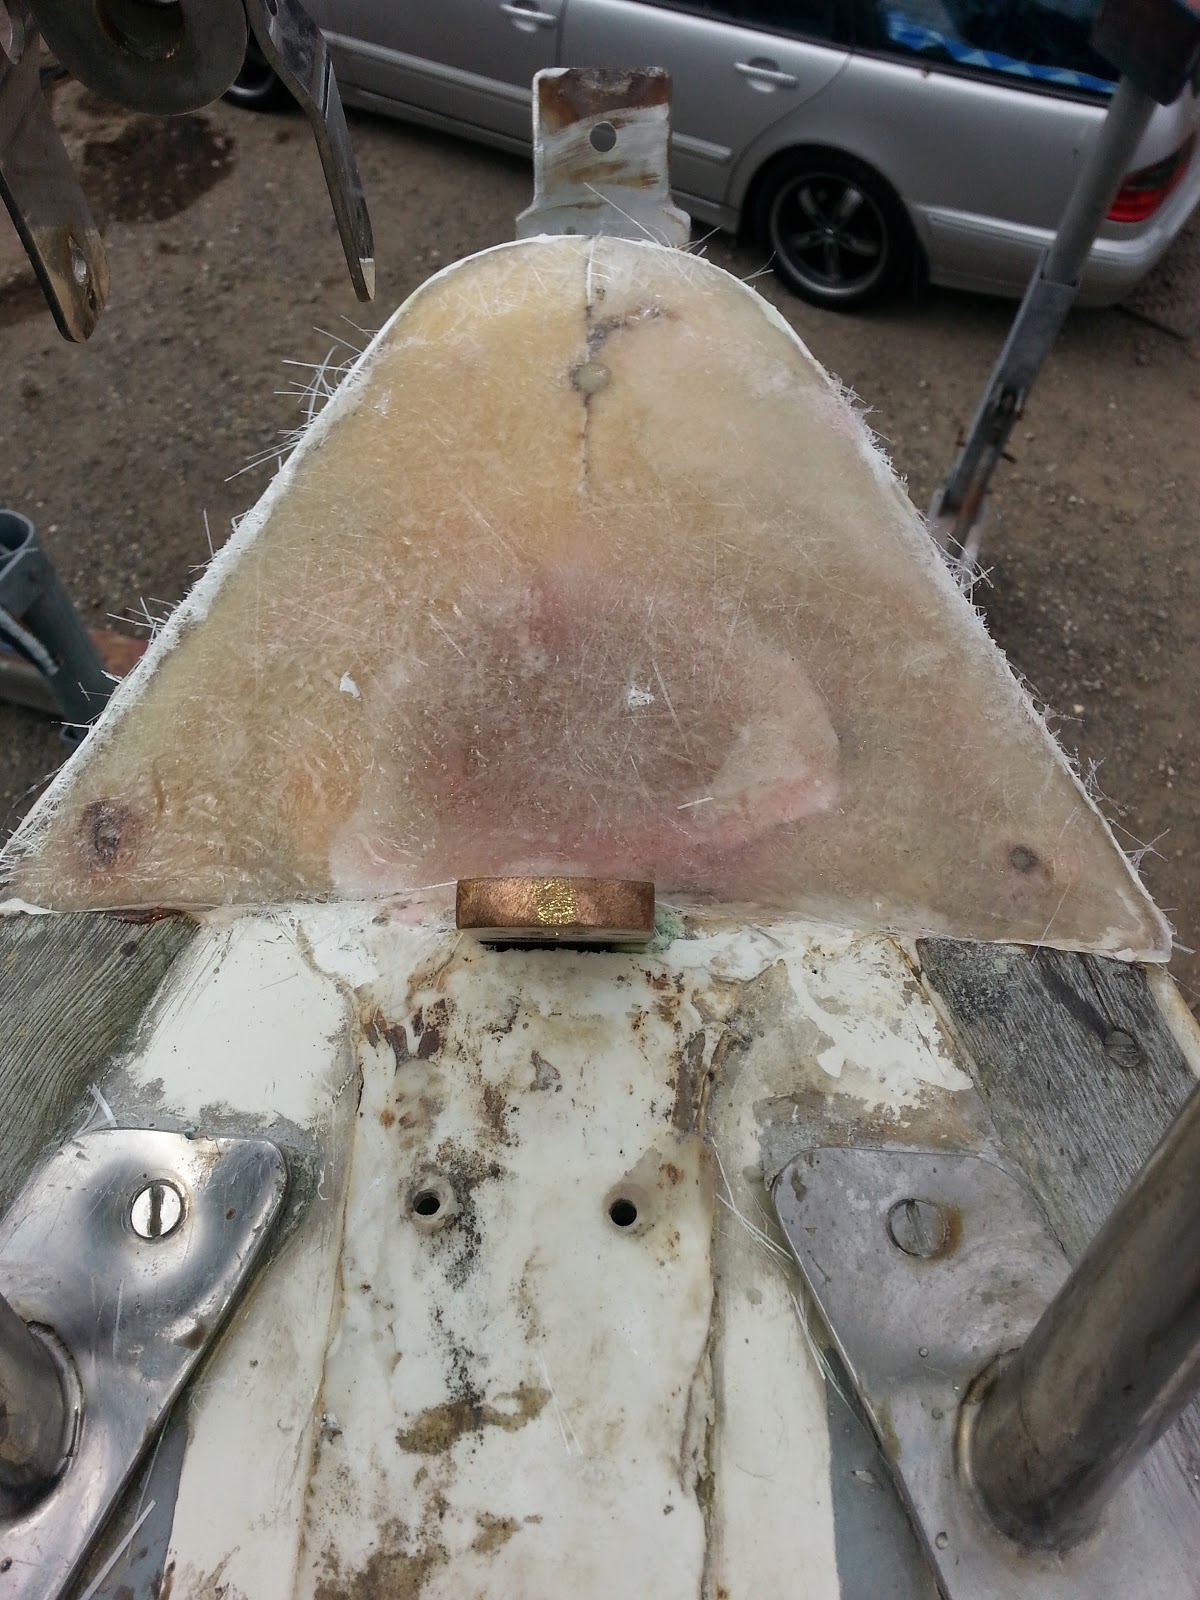
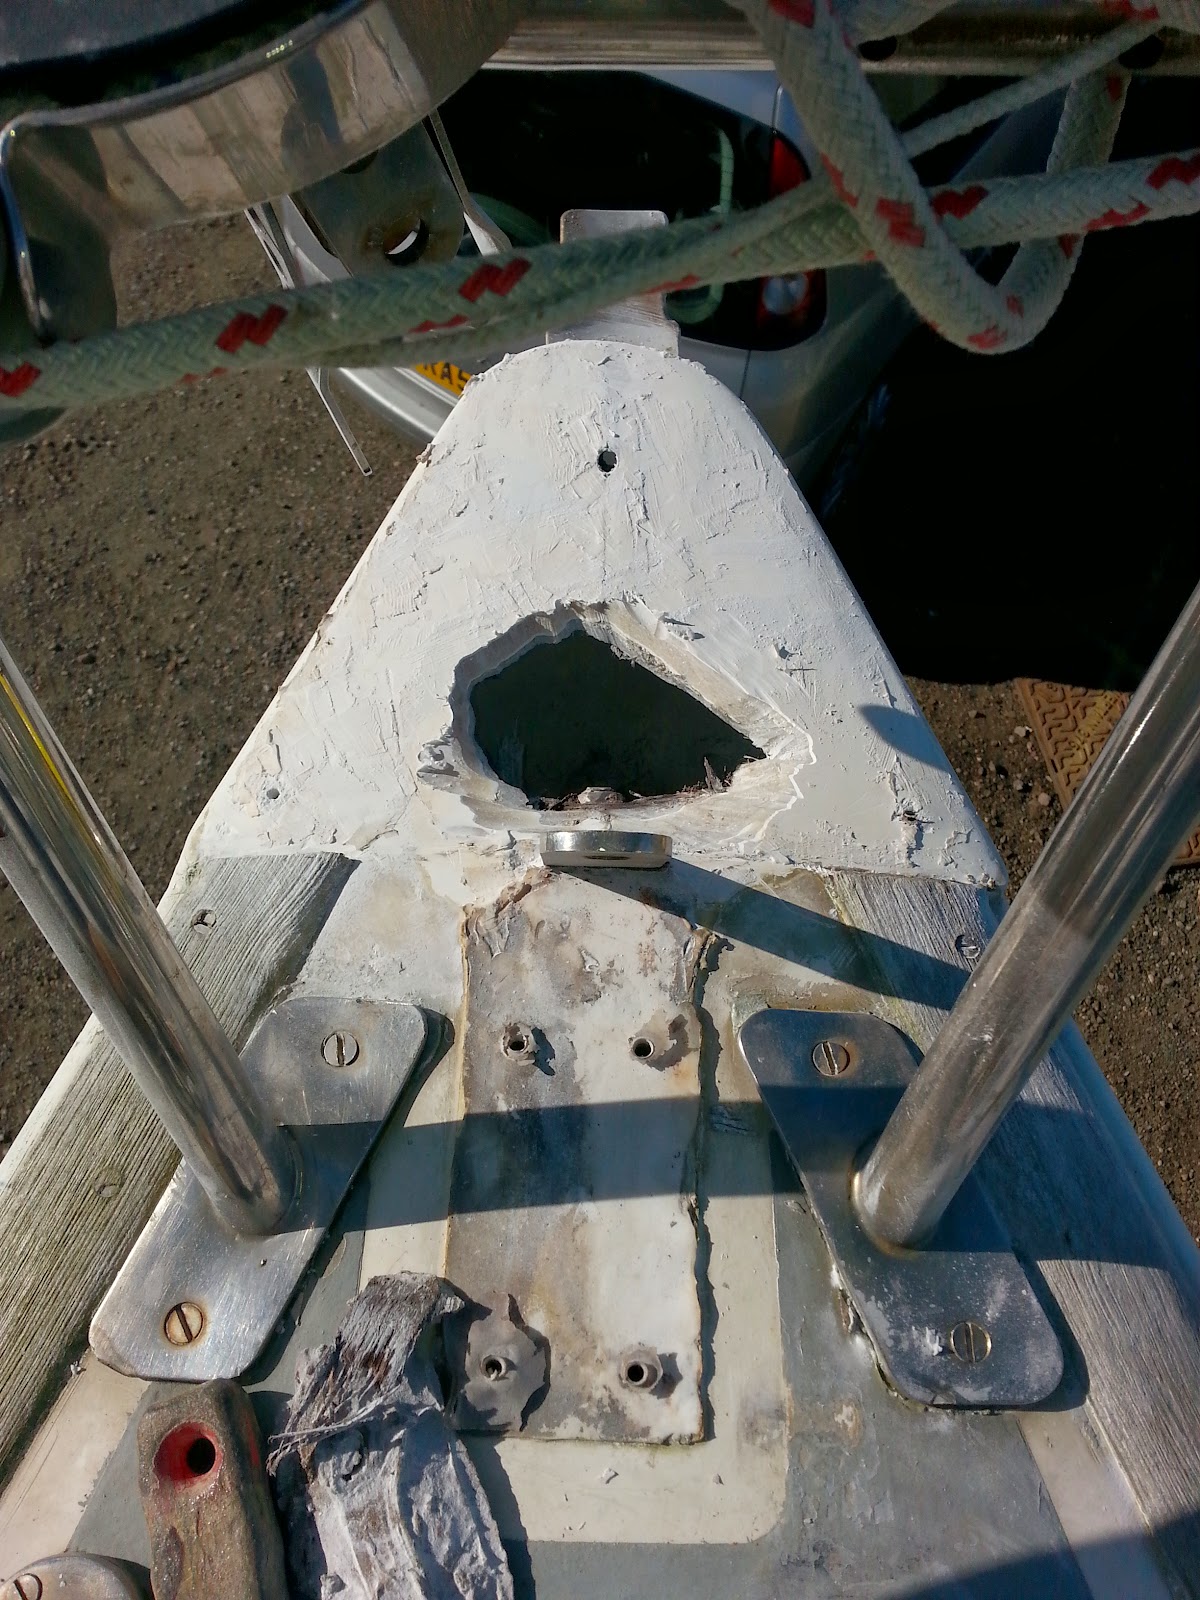
Having installed the new chain plate on the bow the next job was to make good the ugly mess I had created when removing the old one. I tackled that a couple of weeks ago on the 18th April.
First I had to remove the plastic bag covering the hole which previously I had filled with expanding foam. That stuff is very useful but horrid to work with it sticks to everything and is impossible to get off one's skin once it has set which it does very quickly. It had continued to expand after taping on the plastic bag so there was a lot of excess to remove. Fortunately it is very easy to cut one dry and so that was achieved quickly.
Next I had to insert a a plastic gasket over the top of the foam because the resin that I would use to make good the bow would dissolve the foam. I used a section of a Jeckell's sail bag and stuck it in place with marine sealant. Then a few layers of fibre glass resin and matting until it looked like this:
I got the mixture slightly wrong and so the resin dried to quickly but I just got away with it. Then resin mixed with particles until it formed a think paste and applied that which ended up looking like this:
Once that had dried liberal helping of marine sealant before fitting the metal work. Tightening up the four machine screws holding the rear plate on in the picture below was the worst part of the job. Luckily Alan was around and he therefore held the tops of the screws whilst I hung upside down in the anchor locker and tightened the nuts on the inside. My back was very sore for a number of days afterwards.

The next day - once again with Alan's help I fitted the stern chain plate permanently and was then able to refit the backstay, forestay and furling gear. That took a few hours. Fitting roller furling gear is a fiddly job - at least I find it so. Despite re-reading the instructions a number of times I couldn't work out how to keep the foil in place in order to insert the various screws. I resorted to a bit of tape that just about did the job. Once I had finished I discovered the grub screw for that purpose! Anyway I got it all back together as you can see from the photo below and despite the boat still being stuck firmly on dry land, it started to feel a bit more like a boat again. I haven't transferred the shrouds to the new chain plates yet - that can wait until the boat is back in the water.
I took the week off after Easter and was back at the boat on the Tuesday and Wednesday.
First job with Chris's help was to remove the outer prop bearing casing. This we managed but instead of the expected cutless bearing Chris discovered it was a white metal bearing. This apparently is poured in place in liquid for (having previously ensured plenty of grease to prevent the white metal boding with the shaft. However Chris also diagnosed significant wear on the prop shaft and concluded there would be no point in replacing the bearing without also replacing the prop shaft! Happily because the stern gland did not leak significantly and he also concluded that it would be OK to refit the external bearing but be prepared to have to replace the whole shaft at some point in the future. No doubt the engine will have to come out too at some point so I'll probably do both together.
I had also previously noticed that one of the bolts holding the rudder shoe in place looked rusty and so needed to check that out. I consulted Chris once again and he recommended that I took the shoe right off to check it out thoroughly. The last thing I wanted was the rudder failing mid Atlantic!
I put a spanner on the nut expecting to have a real fight to move it but the nut just fell off. It had actually corroded right through.
That's it on the cradle in the photo below.
The bolt was also severely corroded at the tip.
The other nut and bolt was at least still intact but it too was severely corroded.
Wit both bolts removed I was able to remove the shoe.
Unfortunately I didn't take a photo of it. On initial inspection it didn't appear to be in bad shape but Chris spotted crevice corrosion and indeed once cleaned up it was very evident. Chris recommended getting a new one cast in bronze and he immediately set about making a plug to go with the shoe to the foundry. A quick search on the internet (by Alan of all people) and a local address was located in Rochester only a few minutes away from Howard's house. I rang them up and spoke to Mike and arranged to take the shoe and plug round the next day. His foundry is actually in Charlton however.
I spent the rest of the day cleaning up the shoe and bonding plywood strips to the outside in order to ensure a thicker casting was produced. They weren't completely flat so I decided to use marine sealant/bonding gunge for the purpose and hoped that it would set over night so that I could clean it up and ensure all the surfaces were smooth. It did thankfully and in the morning I completed preparing the shoe and took it and the plug that Chris had made over to Mike, the Foundry man in Rochester. I said he could do the job and so I left it with him to price up.
On the way back I stopped off at Howard's for a coffee and natter and once back at the boat decided I would tackle the stuffing boxes on the rudder and propshaft. Both were pretty inaccessible but I had previously managed to move the nuts on the rudder one and so decided to look at the prop-shaft one first. Some weeks ago I had discovered a small inspection hole cut out of the quarter berth bulkhead that I thought must have been made for the purpose of accessing the stern-gland stuffing box. Previous owners had also ensured that the special spanners required were stowed nearby (it took me months to figure what they were). Anyway I could just get the spanners on the nuts at full stretch but the inspection hole was so small that there was precious little room to apply any leverage and I could not move them an inch. It didn't help not knowing which way I should turn the wretched things. I suspected from previous tussles with engine stuff that the only other option was likely to be to approach the gland from inside the cockpit locker on the other (port) side of the boat but that I would probably have to remove the starter battery first and then the platform that it was fixed to and that that task in itself would be a contortionists nightmare even if it could be achieved without radical surgery. I therefore took the easy option and squirted loads of penetrating oil over the nuts and hoped that I would have more luck on my next visit. I then turned my attention to the rudder stuffing box.
That entailed hanging head down in the rope locker (after almost getting stuck in it) and wielding the spanners from there. I got the stuffing box apart OK and removed the old stuffing rope. Fortunately there was spare stuffing rope on board and I cut a piece to size inserted it and applied loads of grease and did the whole assembly back up. Job done within an hour! Then I turned my attention to the steering gear. The steering had become very stiff towards the end of the season and I had no real idea about how sound the steering cable was. Only a fairly small length could be inspected visually and I thought that to be safe I really should remove it. Easier said than done in the confined space under the cockpit sole, approached as I said head first by hanging over the top of the cockpit locker. However, better to tackle it now whilst safely on dry land rather than have it fail mid ocean or even on the river!
I could just reach the nuts on one end of the cable and started to undo it and then realised that the cable ends eventually disappeared up into the steering column through two small diameter holes that the end fittings would never get through and that I would therefore have to remove them first. Not only that but the prospect of refitting them through the system of pulleys and the steering quadrant in the very confined space below the cockpit sole was not one to look forward too. I almost bottled out at that point and very nearly left it all as was. However, I forced myself to face the music and carried on. It soon became clear that the only way of getting the cable off was to cut it which I did with the help of my bolt cutters.
I then decided that re-fitting new cable would be a chore I could do without and that this provided the ideal opportunity to dispense with the wheel entirely and replace it with tiller steering, which, although Arctic Smoke had never had, was the original design configuration. I therefore removed the bolts holding the pedestal in place and went from this:
To this:
Granted it looks a right mess with the locker contents strewn everywhere but the cockpit immediately felt much more comfortable without the wheel and it was certainly much easier to move around. Of course the tiller will have to be installed and that will take up space, but I will install a hinge on the end so that it can be stowed in the upright position.
Since the above works I have heard back from Mike the Foundry man that he can cast a new rudder shoe for £45 which is a bargain and I also tracked down Paul of 'OflandandSea' on ebay who can make me a new tiller for around £250 which considering the time involved is also a bargain.
Next job a return match with the propshaft stuffing box and refitting the external bearing on the propshaft and the prop itself. Then perhaps fitting the new transducers for the depth sounder and the speed log. That will require removing the flexible water tank which will be a chore, but it has a leak and needs a good clean so it needs to be done anyway. With luck I'll get that done this coming weekend and then it's 'just' the anode(s) to sort out before re anti-fouling with the replacement Verometal copper mix and then I can get her back in the water. Still loads to do afterwards of course but the prospect of getting some sailing in begins to feel less far fetched than it once did.